Standard Mosaic Crochet - Tutorial + video + FREE Pattern!
Well, here we go again! Let’s talk about my obsession with color!
It’s real, you guys. I have tried going neutral and it just never feels as right. And Mosaic Crochet has been the perfect outlet to experiment with color, so I’m obviously obsessed.
In my last Mosaic Crochet Tutorial I taught you how to work a super easy variation of Mosaic Crochet. This technique is worked IN ROUNDS and with one row per color. Which is great, but not ideal for every kind of project. Especially when you want to work flat.
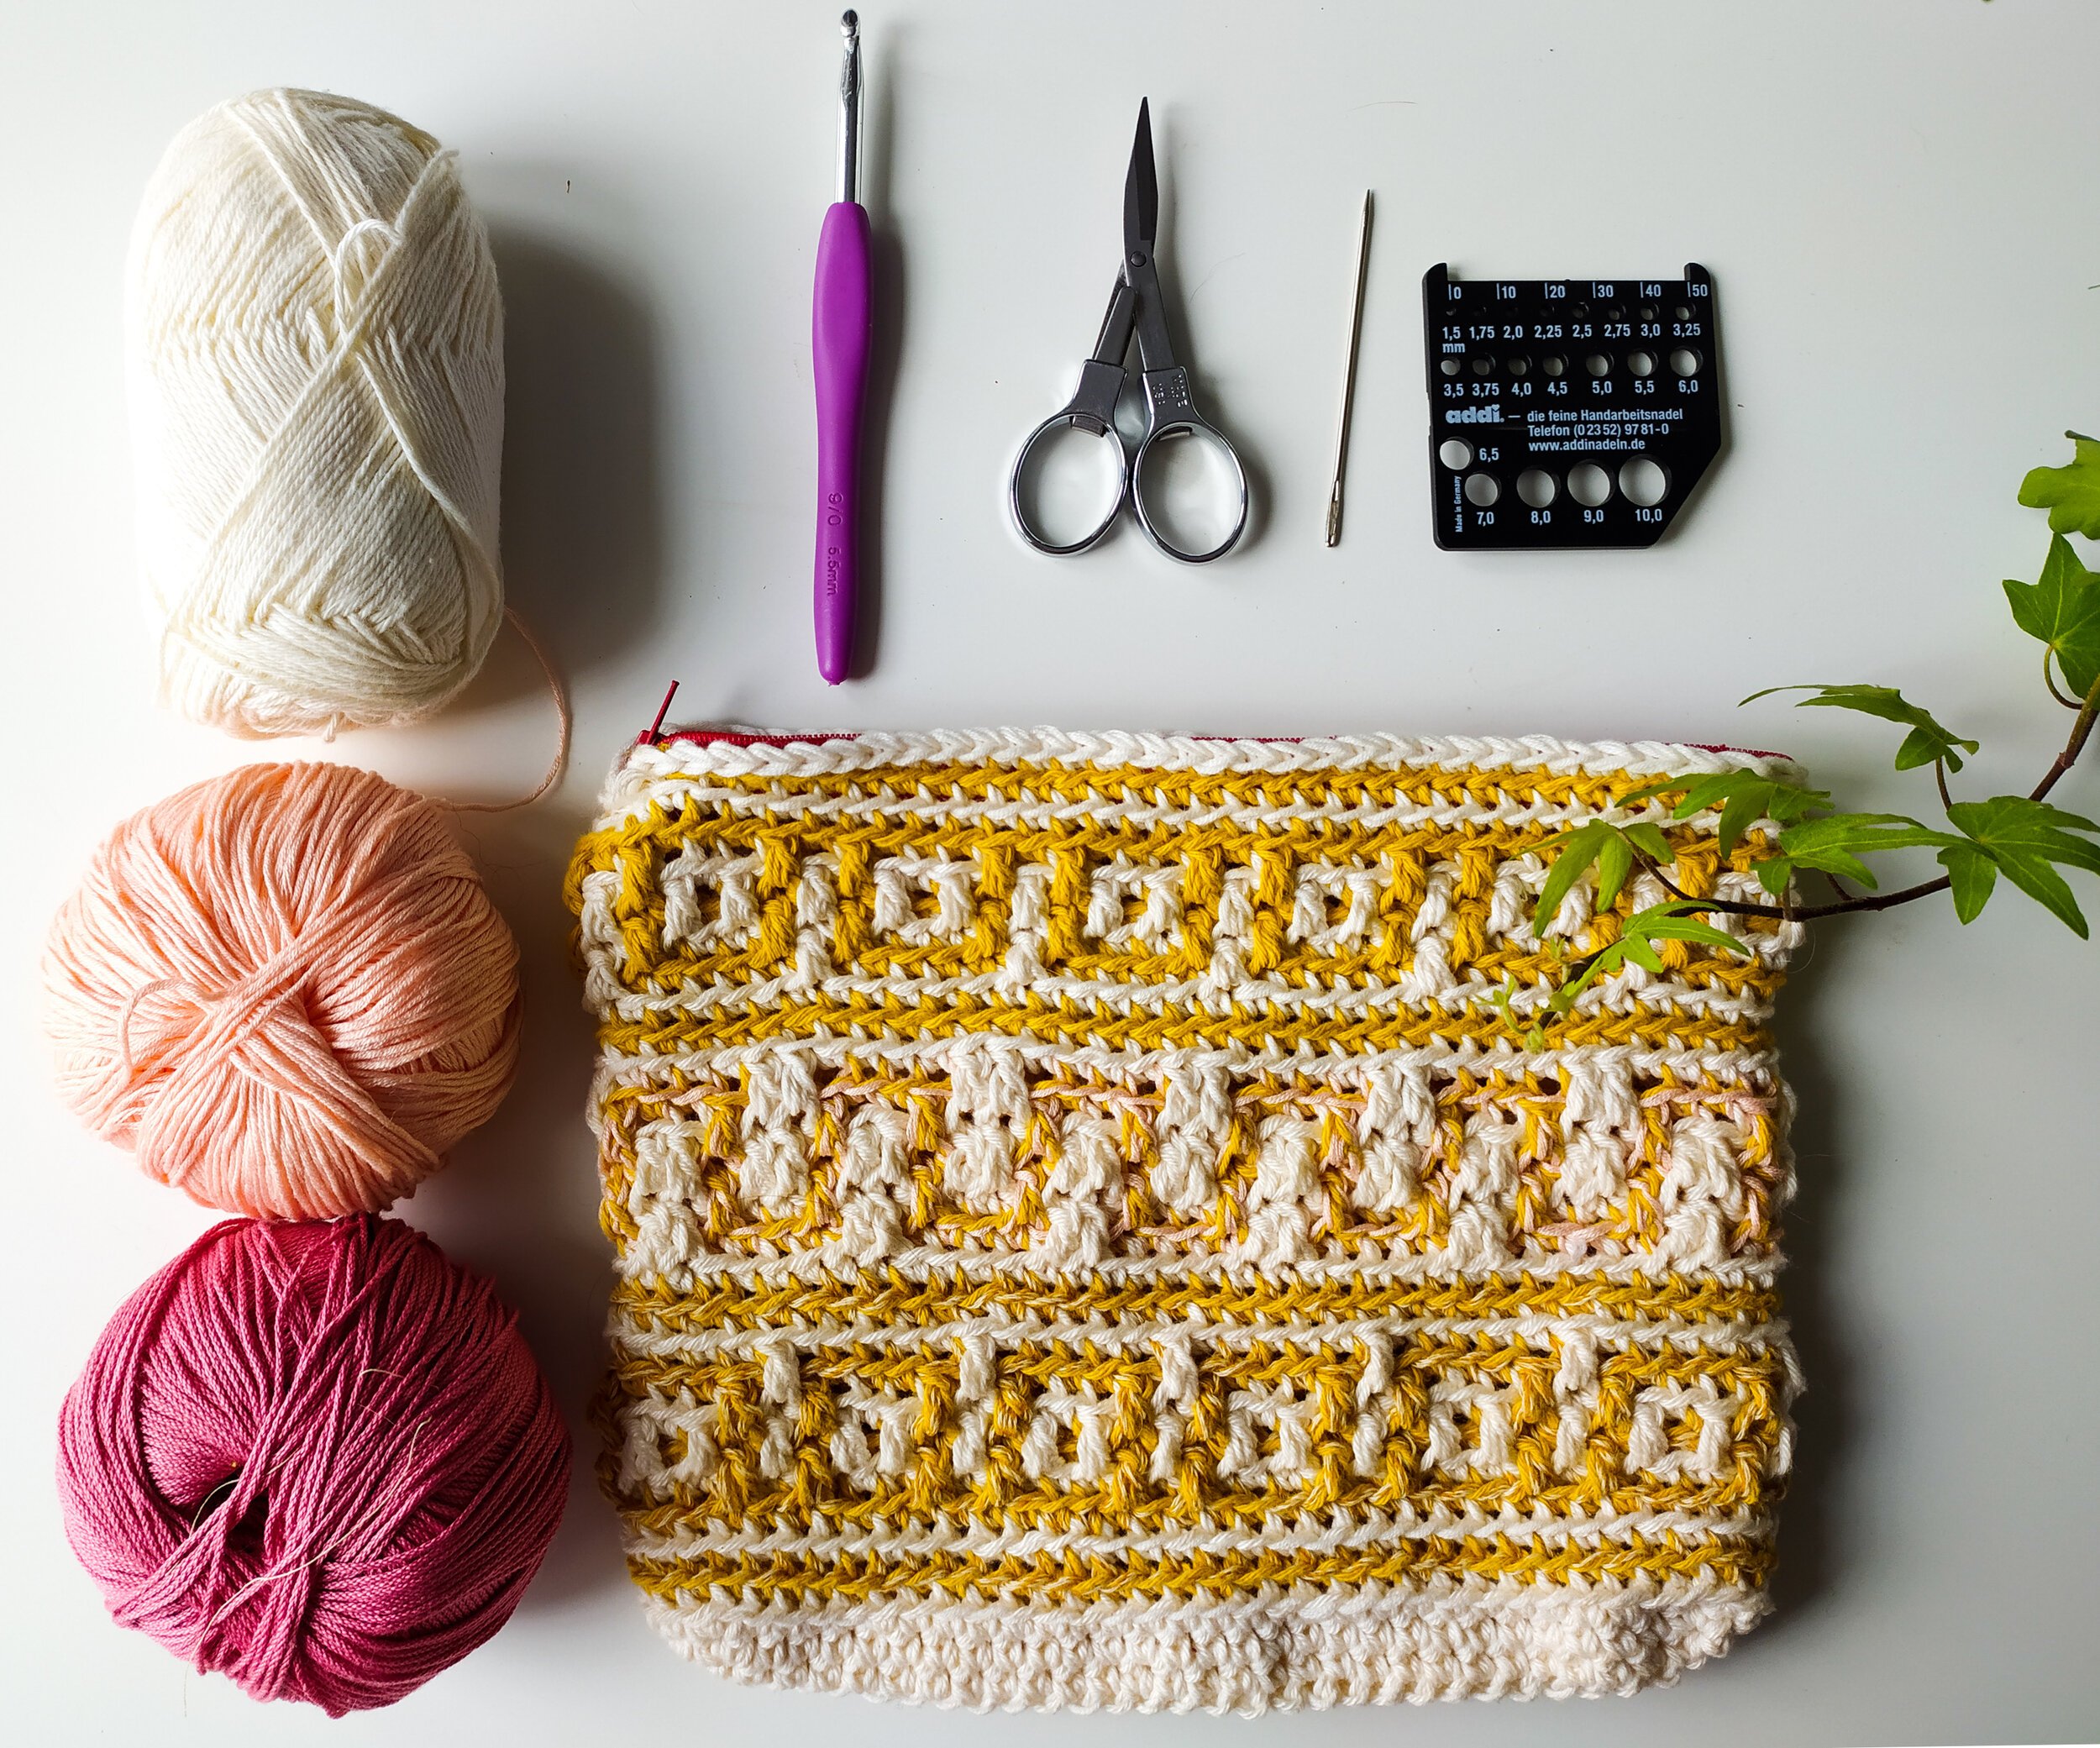
The Mo-Mo Project Bag
This project bag uses the Single-row Mosaic Crochet in Rounds Technique. Find the pattern free in the blog.

Teotihuacan Top
My latest desing using the Single-Row Mosaic Crochet in Rounds Technique. Isn’t it gorgeous?!
So this time I bring you Standard Mosaic Crochet. Up ahead you have the basic rules, a video tutorial and the FREE pattern for the Brickroad Table Set - a set of Coasters and Tea Towel that will complement any home.
You can purchase ad-free printable PDF with Row by Row WRITTEN and CHART instructions HERE.
This technique is a bit more complicated since reading the charts takes a bit more of an effort, but it’s a lot more flexible since you can actually work it flat or in rounds! And the result is still pretty amazing. The best part of Mosaic Crochet? You only work ONE COLOR AT A TIME! So no tangles like with Intarsia or working to hide floats like with Tapestry or Faux Fair Isle!

So what do you need to know to work Standard Mosaic Crochet? You can keep reading or skip ahead to the Video Tutorial.
Here are the basic rules:
Rows

The letters don’t actually show up in the chart. This is just to show you what the colors represent.
All charts are read bottom-up from right to left on odd number rows (RS) and left to right on even numbered rows (WS).One row of the chart represents 2 rows on your work. That’s why there are numbers at both ends. Odd numbers are on the right, so you will read those rows from right to left.
Even rows (WS) basically repeat what you did on the previous row but replace all Ldc with sc. So on ALL even rows you will: sc1 on every sc and dc; (ch1, sk1) above every chsp.
Each row of the chart will be worked with a single color, alternating between A and B. The color for each row is indicated on the first and last column of the chart.
Ch1 at the beginning of every row.
Only the portion INSIDE the red lines will be repeated. The stitches before and after the red lines shall only be worked once per row.
In this case, there are 8 stitches inside the red lines, which is what will be repeated.
The bottom row (00 and 0) is the set up rows, so it will ONLY be worked on the first repeat. Start the first repeat at row 00, then continue with 0, 1, 2 and so on. On following repeats they should be OMITTED.
stitches
All empty squares (no X) of the same color as the row color are sc. All sc sts are to be worked in the previous row as normal. This row will be of a different color from the current one.

For example, in Row 1 and 2 there are 7 white empty squares, which represent 7 sc.
All squares of a DIFFERENT COLOR as the row color are (ch1, sk1).

In Rows 1 and 2 there are 3 blue squares. In those squares you will (ch1, sk1).
All squares with an X of the same color as the row color are Ldc on ODD NUMBERED ROWS (RS).
On EVEN NUMBERED rows squares with an X represent sc1 (WS). Which means that on all even numbered (WS) rows you will: sc in all sc or dc sts and (ch1, sk1) above all chsps..
A Ldc (Long Double Crochet) is a normal (dc) but worked 2 rows down. This row will be of the same color as the current one. That is to say that a Color A Ldc will be made on the previous Color A row. Same goes with CB Ldc.
When you make a Ldc on the row below the previous, you should find the stitch that corresponds to the next st on that row and leave the stitch (ch) from the previous row behind the Ldc and empty.

On Row 1 there is one X, which represents 1 Ldc. On Row 2 this square will be worked as a sc.
So to recap…
here are the written instructions for Rows 1 and 2.
ROW 1 (RS): Ch1, sc1, (sc2, ch1, sk1, Ldc, ch1, sk1, sc1, ch1, sk1, sc1) rep to the last 2 sts, sc2, turn.
ROW 2 and ALL OTHER EVEN ROWS (WS): sc in each sc and sc sts, (ch1, sk1) above all chsps.
closing off the chart
Using these rules you can work the rest of the chart and repeat it as many times as you want, starting at Row 1, and finishing at any row that you choose.
On the LAST ODD row of the chart that you choose to work, you will REPLACE ALL (CH1, SK1) WITH SC1. On the LAST EVEN row you will sc across.
I know this might seem like a lot of information, but it really is not that complicated. Here’s a video tutorial where I go over the rules and I work a few rows of this chart to really help you grasp the rules.
[youtube=://www.youtube.com/watch?v=OE7YBlVzUZw&w=854&h=480]
Brickroad table set pattern
Let’s get to the pattern, then. But first, let me remind you to make sure to share your finished objects using the hashtags #brickroadtableset and #nomadstitches
You can purchase the ad-free printable PDF with written instructions HERE.

Materials:
YARN: Sport yarn (size 2) in 2 different colors (160 m each) for 4 coasters and 1 tea towel.
Sample used Drops, Safran, 100% Cotton in Black and Off White (1 ball of each).
*The coasters need to be close to the size of the sample, so it is recommended to get as close as possible to the suggested gauge. However, since the tea towel is highly customizable, you may use whatever yarn you already have in your stash and use whatever hook matches that yarn since gauge is a lot less important. Remember that thicker yarn will make for thicker fabric. In the same way that thinner yarn will make for thinner fabric.
HOOKS: 4 mm.
NOTIONS: tapestry needle
GAUGE
20 sts x 25 sc rows = 10 x 10 cm
Sizes + measurements
This pattern comes in one adaptable size for coasters and a tea towel.
Coasters: 10 x 10 cm / 4 x 4 in
Tea Towel: 37 x 25 cm / 15 x 10 in Highly customizable to taste.
Abbreviations (US)
dc: double crochet
Ldc: Long double crochet - a normal double crochet worked 2 rows down
RS: Right side
rep from *: work from the first asterisk (*) as many times as indicated
sc: single crochet
st: stitch
sk: skip stitches or spaces
WS: Wrong side
Construction + Pattern Notes
Coasters: Worked flat you will work the chart from the first row until it resembles a square. Then an edging is worked around the square.
Tea Towel: Worked flat, you will first work the chart for about 1/3 of the total length of the towel. Then a section of griddle stitch goes in the middle covering the next third. The chart portion is repeated at this end next. And finally an edging is made on the last row and on the starting chain.
Coasters

With CA, ch 20.
ROW 1: Starting at the 2nd chain from your hook, sc in each ch, turn, [19 sts - stitch count will remain constant throughout]
ROW 2: Ch1, sc in each st, turn.
You can purchase the ad-free printable PDF with written instructions HERE.
Find the chart attached at the end of this document.
ROWS 3 - 20: Work chart from row 00 - 16 (starting at 00, then 0, 1, 2, and so on).
ROWS 21 - 22: Work Chart Row 1 and 2 but instead of doing (ch1, sk1) on squares of a different color, simply sc1 on that stitch.
If the border will be made with the last color worked on the chart (CA), don’t cut but continue with edging. Otherwise, fasten off, cut and skip ahead to edging.
Edging
Attach yarn to a corner of your work on the RS. Ch1, *sc 1 in each stitch, starting chain or side of each row to the next corner, sc3 in next corner, rep from * 3 times, sc 1 in each stitch, starting chain or side of each row to the last corner, sc2 in last corner, slst to join round.
Tea towel
Mosaic stripe 1

This pattern is very adjustable and adaptable. It can be turned into a larger towel, a table runner or place mats. Keep in mind that your choice in yarn will have a lot to do with the finished object. For a place mat I would use thicker yarn (heavy sport or DK) with a 4 mm hook or so.
For the pattern sample a light sport yarn and a 4 mm hook were used to make a light fabric that could work as a tea towel.
With CA, ch multiples of 8 + 4.
The sample did 52 chains (8 x 6 = 48 + 4 = 52). You can adjust the width by adding more or less chs than the sample
ROW 1: Starting at the 2nd chain from your hook, sc in each ch, turn, [51 sts - stitch count will remain constant throughout]
ROW 2: Ch1, sc in each st, turn.
You can purchase the ad-free printable PDF with written instructions HERE.
Find the chart attached at the end of this document.
ROWS 3 - 24: Work chart from row 0 - 16, then from 1 - 4. For a wider colorwork stripe, simply continue to work the chart until desired length FINISHING ON AN EVEN NUMBERED ROW MADE WITH CB.
ROWS 25 - 26 (or last 2 rows of colorwork stripe - W/CA): Work Chart Row 5 and 6 (or the next one from where you left off) but instead of doing (ch1, sk1) on squares of a different color, simply sc1 on that stitch.
Middle part
This whole part is worked with CA. Cut BC.
ROW 1: Ch1, sc1 in next st, (dc1 in next st, sc1 in next st) rep to end of the row, turn.
ROW 2: Ch1 (make this chain slightly longer), dc1 in next st, (sc1 in next st, dc1 in next st) rep to end of the row, turn.
Repeat Rows 1 & 2 until the middle part of your towel measures approximately 20 cm or until desired length. Keep in mind that you will make another Mosaic Stripe at the other end.
Mosaic Stripe 2
ROW 1 - 2: Ch1, sc in each st, turn.
Repeat Mosaic Stripe 1.
After the last row, continue as follows:
Edging
With CB, sc to end of the row.
*to add a loop for hanging, ch8, slst in last sc from the edging row. Cut yarn.
Attach yarn to bottom corner and work a sc row on unused loops of starting chain. Fasten off and cut.
Finishing touches
● Weave in all ends.
● Block your work using a little bit of starch if desired to help keep the square shape of the coaster.
● Add tassels or a fringe to the tea towel / mat.
Chart
All charts are read bottom-up from right to left on ODD number rows (RS) and left to right on EVEN numbered rows (WS). The placement of the row numbers indicates where to start. Odd numbers are on the right, so you will read those rows from right to left. Left numbers are on the left, so those rows will be read left to right.
Each row of the chart will be worked with a single color, alternating between A and B. The color for each row is indicated on the first and last column of the chart.
Only the portion INSIDE the red lines will be repeated. The stitches before and after the red lines shall only be worked once.
Start the first repeat at row 00, then continue with 0, 1, 2 and so on. On following repeats rows 00 and 0 should be OMITTED.
All empty squares (no X) of the same color as the row color are sc.
All sc sts are to be worked in the previous row as normal. This row will be of a different color from the current one.
All squares of a DIFFERENT COLOR as the row color are (ch1, sk1).
lAll squares with an X of the same color as the row color are Ldc on ODD NUMBERED ROWS (RS). On EVEN NUMBERED rows squares wit an X are worked like sc (WS). Which means that on all even numbered rows you will: sc in each sc or dc sts;(ch1, sk1) above all chsps.
All Ldc are to be worked on the previous to last row. This row will be of the same color as the current one. That is to say that a Color A Ldc will be made on the previous Color A row. Same goes with CB Ldc.
When you make a Ldc on the row below the previous, you should find the stitch that corresponds to the next st on that row and leave the stitch (ch) from the previous row behind the Ldc and empty.
Your stitch count will remain the same on every row of the chart repeats.

*Chart was taken from Barbara G. Walker’s book Mosaic Knitting and adapated for crochet.
*Chart was taken from Barbara G. Walker’s book Mosaic Knitting and adapated for crochet.
